
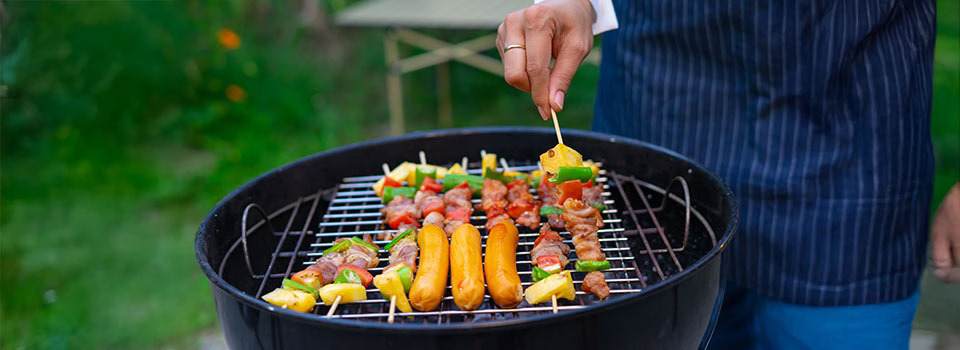
Grilling season runs longer in Durango than people give it credit for. Plenty of folks around here are still cooking outside in November — the trick is having a space that’s actually set up for it and a fire you know how to control.
This guide covers both: getting the backyard ready, then running the grill like you mean it.
Step 1: Get the Space Ready
Before the food, the patio. A season of sun, pollen and monsoon dust leaves concrete, pavers and deck boards looking rough, and it only takes an afternoon to fix.
A pressure washer will take years off a patio or deck. Work at a consistent distance with a wide fan tip — a narrow tip held close will carve stripes into softwood decking and etch concrete, and you can’t undo that. Let everything dry fully before you do anything else.
If the deck’s due, that’s your window. Clean, dry, then seal or stain it. Our UV is brutal on horizontal wood — most Durango decks want attention every two to three years, not the five the can promises.
The Ted’s Angle
A pressure washer is the classic rent-don’t-buy tool. You’ll use it two or three times a year, it takes up half a shed, and the cheap ones die in a season. Grab ours for four hours on a Saturday morning and hand it back before lunch. And if you’re hosting something bigger, we rent tables, canopies and event gear too.
Step 2: Know Your Fuel
Gas, charcoal and pellet each do something different, and the right answer depends on how you actually cook.
- Gas — fast to light, easy to control, cleans up quickly. Best if you grill on weeknights. Weakest on smoke flavor.
- Charcoal — higher peak heat and real char. Takes 20 to 30 minutes to come up to temperature and more attention to hold a temp. Lump burns hotter and faster; briquettes burn steadier and longer.
- Pellet — set-and-forget temperature control and genuine smoke. Excellent for low-and-slow, less impressive for a hard sear.
Whatever you burn, keep a spare on hand. Running out of propane halfway through a cook is a Durango tradition nobody enjoys, and we sell propane exchange right here.
⚠ Safety Alert!
Never use lighter fluid on a lit or smoldering fire, and never use gasoline on a grill under any circumstances. Use a chimney starter or fluid applied before lighting. Check propane hoses and fittings for leaks each season with soapy water — bubbles mean a leak. And keep grills at least ten feet from the house, the deck railing, the eaves and anything overhanging.
Step 3: Build a Two-Zone Fire
This is the single technique that separates decent grilling from good grilling, and almost nobody does it.
Instead of spreading heat evenly across the whole grate, build a hot zone and a cool zone. On charcoal, bank all the coals to one side. On gas, run the burners on one side and leave the others off.
Now you can sear over direct heat, then move food to the cool side to finish through with the lid down. Thick cuts cook through without burning. Flare-ups have somewhere safe to go. And you have a place to park things that are done while everything else catches up.
Helpful Tips
- Preheat with the lid closed for 10 to 15 minutes, then scrape the grate clean while it’s hot. Food releases from a clean hot grate and welds itself to a dirty cool one.
- Oil the food, not the grate. Oil on hot metal just smokes and burns off.
- Leave it alone. Most sticking is just food that isn’t ready to release yet — give it another minute and it’ll let go on its own.
- Anything over an inch thick benefits from the cool zone. Anything under it usually doesn’t need one.
Step 4: Cook to Temperature, Not to Time
Every chart you’ve ever read assumes a grill temp, a cut thickness and a starting temperature that don’t match yours. An instant-read thermometer is a ten-dollar fix for the most common failure in backyard cooking.
USDA minimum safe internal temperatures:
- Poultry (whole or ground) — 165°F
- Ground beef, pork and lamb — 160°F
- Beef, pork, lamb and veal steaks, chops and roasts — 145°F, then rest 3 minutes
- Fish and shellfish — 145°F
- Reheating leftovers — 165°F
Take temperature in the thickest part, away from bone. And pull food a few degrees early — it keeps climbing after it comes off, which is where a lot of overcooked steak comes from.
Helpful Tip
Altitude doesn’t change the internal temperature your food needs to hit — 165°F is 165°F in Durango and in Denver. What it does change is how long the cook takes. Thinner air and cooler ambient temperatures mean anything slow and indirect will run longer than the recipe says. Plan for it and don’t rush the lid.
Step 5: Handle Food Safely
Keep raw and cooked separate all the way through. Separate cutting boards, separate platters, separate tongs — and never put cooked food back on the plate that carried it out raw.
Marinate in the refrigerator, not on the counter, and if you want marinade as a sauce, set some aside before the meat ever touches it. Keep cold food in a cooler at 40°F or below until it goes on the grill, and get leftovers back into refrigeration within two hours — one hour if it’s above 90°F.
Step 6: Clean It Right
Burn off the grate while it’s hot, then scrape. Empty the grease trap regularly — grease fires start there more often than anywhere else on the grill.
Once a season, pull it apart. Clean the burner tubes and clear the ports on a gas grill, dump the ash pan on a charcoal grill, and vacuum the fire pot on a pellet grill. Then cover it. A cover or tarp is the cheapest thing you can do to add years to a grill in our climate.
⚠ Safety Alerts!
- Keep a fire extinguisher within reach of the grill. Never use water on a grease fire — close the lid and cut the fuel instead.
- Never grill in a garage, on a covered porch, or under an awning. Carbon monoxide is odorless and it kills.
- Dispose of charcoal ash only after it’s completely cold — 48 hours is the safe rule — and put it in a metal container, not a plastic bin or a paper bag.
- Check for fire restrictions before you light anything. La Plata County fire bans are common in dry stretches and they can apply to charcoal and open flame, not just campfires.
- If you’ve got wire-bristle brushes, inspect them for loose bristles or switch to a bristle-free scraper. Loose bristles end up in food.
Step 7: Stretch the Season
The nights get cold here well before the grilling should stop. A few additions buy you two more months of using the backyard.
Outdoor lighting or string lights so you’re not cooking by phone flashlight at 6 PM in October. A fire pit or patio heater for the seating area. Insect control through late summer. And outdoor-rated extension cords plus a weatherproof outlet cover if you’re running anything electric out there.
Clean patio, two-zone fire, thermometer in hand. That’s the whole game — everything else is just deciding what to cook.
Project Shopping List
Here’s what you’ll need to complete this project successfully.
- Pressure washer (rent)
- Tables, canopies and event gear (rent)
- Generator (rent — for cooking away from power)
- Propane exchange — available in store
- Deck stain and sealer
- Outdoor furniture and patio cleaner
- Instant-read meat thermometer
- Long-handled tongs, spatula and bristle-free grill scraper
- Chimney starter and charcoal
- Fire extinguisher
- Coolers and outdoor cookware
- Grill cover or tarp
- Outdoor light fixtures
- Outdoor-rated extension cords
- Weatherproof outlet cover
- Insect repellent
- Yard cart for hauling gear and firewood
Related Articles
Now Is the Perfect Time to Rent a Pressure Washer
What a pressure washer can and can’t do, plus how to use one without damaging what you’re cleaning.
Learn more →July 4th Weekend Projects
Quick backyard wins you can knock out in a weekend before company arrives.
Learn more →Boost Your Curb Appeal
The same cleaning and refinishing work that fixes a patio also transforms the front of the house.
Learn more →Prepare for Winter with Firewood in Durango
If you’re cooking over wood or running a fire pit into the fall, here’s how to get your wood right.
Learn more →Best Projects to Finish Before Winter
Deck sealing, patio repair and the rest of the outdoor list — while the weather still cooperates.
Learn more →
📍 999 College Drive, Durango, CO 81301 |
🕒 Mon–Sat: 7am–6pm | Sun: Closed |
📞 (970) 247-2930
Ted’s — Your Partner in Every Project.
Related Posts